Welcome to the “advanced class” of Enemy Busting
I’ve had many requests to put this guide together. It’s an ongoing “work in progress” as I refine my craft and add content. Screenshots are too hard to gather while attacking, so I decided to take videos for reference and post them at the bottom. Read the whole guide before watching the videos, you’ll need the context. Keep in mind this is MY strategy that I’ve put together, there are other ways of doing this and not all of my methods will work for everyone but you can take some of my ideas and form your own style and methods. A lot of these strategies were tried and refined and perfected by Gaybe Rooth and me doing weeks of top kills and combining ideas. Most of the target selection advice comes from what he taught me back when I first started busting. If you see something on this guide and think “hmm that doesn’t look right” that’s ok, because this isn’t a “this is how you should do enemy buster” it’s simply a “this is how I do enemy buster” guideline. I’m calling this the “advanced class” because it assumes you’re already familiar with the basics of attacking, using resource tiles to travel faster, and continuous marching to hit opponents over and over without returning home in between.
I started busting heavy around HQ24, and would get over 200k kills a week. I get way more now, but don’t be discouraged by your size to participate in Buster day. It’s not the size of your squad that matters, but it’s approaching with the right strategies and playing smart.
Keys to this Strategy:
- Keep the base totally empty to avoid taking any troop losses.
- If your troops are off the wall but you have excess troops in drill ground, you still take troop losses with every hit. Drill ground troop loss is troop death, not hospital for healing, but just total death. If you lose 400 drill ground troops per hit, you might lose 4000 troops getting your base destroyed that you can’t get back. People think they are safe if their troops are off the wall, this is completely incorrect.
- Troops can’t die in transit to a destination. Only when they’re parked. So the key here is to never park them unless it’s in an ally bubble as garrison. That’s the only place they are safe to park. If you can’t park them, send excess squads across the map to a resource tile or to slow march to a zombie in the corner of the map that it will likely never reach. A 20 minute march across the map gives you plenty of time to attack with your squad 1 until you’re ready to teleport out.
- Troops can’t die if they’re in your hospital or emergency center. If troops are healed but not “collected” yet – don’t collect them unless you’re ready to move them, because collecting them sends them to the drill ground. Similar to new troops at the barracks, don’t collect unless you’re ready to move them because they cannot die until they are collected. In this method of playing, the hospital capacity is as important (or MORE important) than your drill ground capacity. When you get Special Forces tech to 40% you can unlock another hospital. Do this ASAP.
- Attack until you lose squad 1 troops and need to refill. Don’t bring your other squads back, simply teleport out and that will bring your troops all home.
- Allies that remain shielded during buster can park in the enemy hive or even random places on the map to give you a safe place to send your extra squads while you attack.
- If you send them to a resource tile, watch the timer! Never let them land on the tile. Recall them before they reach it. Tricky rascals will see you headed there in a few minutes and jump in the tile ahead of you to kill your troops. Don’t get out-rascaled and never let them land. When you see them get close, send them to another far destination.
- Keeping Squad 1 on the wall means being careful not to be caught at home, but gives you the option to purposefully send them home for defense if you need it.
Prep Work:
- Phone “works” but PC/Laptop desktop app is ideal, even if it’s just for map benefits. But I prefer the mouse to a touchscreen every time.
- You need 10k troops. Not 30k. Not 20k. 10k is great. 8k works too. I’ve done 600k enemy kills on 6k troops before. More than this is not needed and risks giving too many points to the other team. Some people disagree with this, but this is how I roll. You ONLY NEED a little over 1 squad worth of troops to participate. So 3k troops is fine, but after the inital attacks on the enemy hive, 10k troops can turn into 3k troops really fast so I like to start with a bit of a buffer.
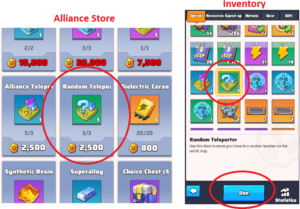
- From the Alliance Store stock up on all of the healing speedups (both 8 hour and 1 hour) and if you have extra credits floating around grab the troop training ones too.
- Also purchase 1 or 2 Random Teleporters to get you out of a jam.
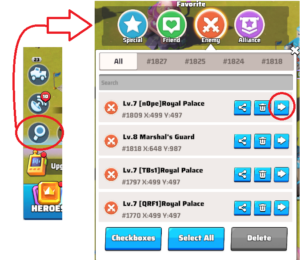
- 2 hours before reset, find the enemy hive and bookmark all of the bases that have shields up. (Ask WC if you don’t have a bookmark to that server). Don’t bother doing this 1 hour before reset, as Desert Battlefield gives them a 1 hour shield anyway, and it will give you false results. You need to mark everyone with shields up 2 hours early. Those with 24-hour shields up 2 hours early will also EXPIRE 2 hours early. So throughout the day you’ll be able to frequently check your bookmark list and see if there are any marked without shields. If you find them with the “early shield” marker but no shield up, attack ASAP because it means they have fresh troops to kill. I use the Green bookmark (I think it’s called “Friends”) since I use Special (Blue) for my regular farms and Attack (Red) for new targets I find while scanning the map.
- Leave Squad 1 on the wall. Take the other squads off the wall. (The trick is to never leave them home, so it doesn’t matter)
- Save as much Stamina as you can all week. Every day of the week open Drone Boost Arms Race chests by using the Free Claim Stamina packs and then buying 100 Stamina for 300 diamonds. Use 500 diamonds for the next 100 stamina if you’re planning to go extreme, but the first pack is fine then just use your Stamina stock as needed to open the rest of your Arms Race chests.
- Spend down your gold right before Buster starts. When you get hit (you will get hit), you want more iron and food to be in your plunderable resources compared to gold. Then you’ll take less coin loss. Try to start a coin heavy tech or upgrade UR Hero Gear before the battle starts. If this is not possible, open a few Iron and Food chests if you have to, it’s not the amount that’s important but the ratio to gold.
Things to Practice:
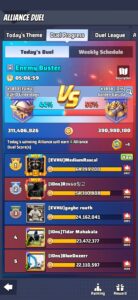
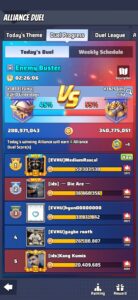
- Quickly Teleport back and forth from server to server using:
- The VS Menu
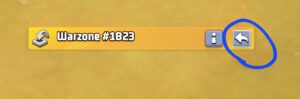
- The “Back” arrow in the yellow banner at the top of the screen when you’re in another server
- Bookmarks you’ve saved
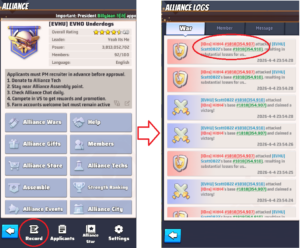
- Links found in the Alliance Logs
- The VS Menu
- Quickly find and use Random Teleporters. When you buy them they go to inventory. Get fast at locating and clicking “Use” from inside inventory.
- “Free Random Teleporters” – don’t panic if you see red flashing attack lights incoming. This is going to be hard to get used to at first, since initial reaction has likely been panic and get out of there.
- If all of your troops are safe, take the few seconds to analyze the situation and see if you actually need to get out of there.
- If you still have troops at home that don’t fit in squads on an endless march then yes get out. Otherwise, just see how it goes.
- Half the time the attacker sees no troops and leaves you alone. If they keep attacking you, just think of it as a “free random teleport” and just continue Busting in your new random area.
- Quickly checking Battle Reports for Drill Ground kills. Get fast at checking so you can pop in and out of the BR real quick.
- Interval healing. Heal troops 1 hour at a time. That way “alliance help” can get you troops without speedups, depending on how active at the time, sometimes within a few seconds you can heal 1 hour of troops. To do this, simply move the slider to the left until the timer says 1 hour, then click Heal and Help. If there are a lot of people online you can go higher, just try it with different times depending on who’s on.
- Find the far corner of the map as soon as you land and deploying all Squads to resource tiles. The faster you do this, the quicker they are protected.
- Note: You must send Squad 1 first. This guarantees a full squad when you send. In the event of you only having 3k troops (which is one full squad and a partial squad) if you start by sending Squstuff and need to replenish your 3k troops in a hurry. Use interval healing (the bullet above) as much as you can for free heals. If you have an 8-hour speedup and need to heal less than 8 hours, use it anyway. The balance will be returned to you as 1-minute healing speedups in the mail.
First Attacks:
- Right at reset you’ll have 5 minutes before you’re able to teleport. Use this 5 minutes to open your Arms Race chests and then swap Arms Race to Drone Boost
- A few minutes before you can attack, go to the map and study the VS enemy hive for the best places to teleport. Everyone should have shields up by now that are going to have shields up.
- Note: You won’t have access to their hive in the VS menu the first 5 minutes after reset. You’ll have to use the bookmarks you saved during prep (when you marked all the enemy bases with shields) to get to their server.
- Keep in mind, their heavy hitters are going to be doing the same rush to our hive, which works out because it often leaves their unshielded bases completely defenseless.
- As soon as you’re able (5 minutes after reset) teleport next to bases that you find manageable and start sending your squad 1 to the biggest base you can handle, and squad 2 and 3 to the biggest bases they can handle at the same time. As you see kill count numbers pop up, keep sending to the bases with troops until they’re all dead or the base is gone.
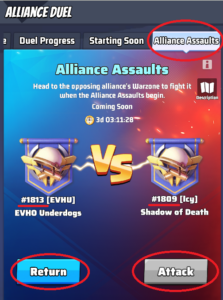
- When all bases in the hive are on fire and all troops are dead OR if you get ambushed and can’t handle it, teleport back to 1813. Do NOT teleport to our hive, pick a spot a few screens away or somewhere else safe. In our hive you will be a target and that’s the first place they will look for vulnerable bases. You will be trapped there since your teleport is likely still on cooldown.
- As soon as you land on any server (even our own server) move your squads to safe places (ally bubbles preferred).
- After first port home, check your drill ground, check your hospital, see how bad the damage is and heal as needed. You only NEED one full squad to keep going. If you have more than that after initial enemy hive attack you might want to go back if you see more targets.
The rest of Buster has everything to do with target choice, keeping troops safe, and not wasting stamina. As far as execution, it depends on the targets and if you think they are hostile. But there’s really 2 main ways to execute.
- Teleport in, park right by the base you want to attack, and just go for it. It’s high risk, they might attack back. But it’s the most direct and easiest to ensure kills. Especially if they’re also participating in buster day, you have to make sure you can get in some swings before they teleport away.
- Park far away. Edge of the map or middle of the map in the desert where no one else is parked. You might also consider parking in the mud around a city, because then if you do get attacked, continuous marching is not allowed and it sometimes minimizes the number of times you can be attacked giving you plenty of time to teleport away if needed. Parking in the mud also prevents shielded bases from parking near you, if your attacker brings allies to garrison their base while they attack. Once you find a spot, travel a few minutes to a resource tile you want to start attacking from, and then start attacking nowhere near your own base. This method is also good at sneaking up on active players that will definitely teleport away if you teleport next to them.
Picking Targets
- When your troops are safe under an ally bubble and teleport is in cooldown is a great time to scan the enemy map for targets. Use the red Attack Bookmark to save them as you find them.
- Finding bases belonging to active players is key. Those are the only ones with troops and the only ones we care about.
- Look for bases L17 and above that are NOT on fire and don’t have a low HP bar. They must have an alliance tag, otherwise they are likely inactive farms and have been cleared out long ago. If they are on fire then another attacker likely beat you to clearing out the troops already.
- On a similar note: If you’re on fire – leave it! Don’t request allies to put out your fire, and don’t put out anyone’s fire until after buster day. The point I made above applies to you as well, if you look like you’re on fire and have already taken a beating, it makes you less attractive to attackers looking for kills.
- Best targets. Look for a cluster of bases where everyone is bubbled except for a small few. These are the few that are active but forgot to log in Friday night to put up a shield. These have the best kills. It’s also the highest risk because these bases risk having garrison. Size up their allies to figure out your confidence levels. If you are parked nearby you can scout first to check for defenses. But if you’re parked far away, scouting will give them plenty of heads up to get reinforcements in place.
- 2nd best targets. Allied bases NOT in the “asteroid belt”. Bases outside the belt or inside closer to the capital are there because they chose to be. Not because they were ashed and forced to be randomly relocated. Bases located in places they choose mean they are likely active and likely have troops.
- 3rd best targets. Allied bases in the asteroid belt.
- Bonus targets. Resource tiles. These are my favorite because they don’t use stamina, it’s fast to get there, and it’s guaranteed kills. Check the size of your victim before you attack and make sure it’s a target you can handle. I just avoid all HQ30 collectors whether I think I can take them or not.
- Look for troop travel lines in the map. This will clue you in to other people attacking and other people moving troops around. Troops means potential kills. Look for dig sites to see which accounts are active, look for lines going to doom elite rallies, and really just any lines on the map means there is an active player nearby. When you attack a resource tile, the dead squad will return back to their base on fire. Simply follow the line back to their base and AFTER they arrive home, hit that base to get more kills. Hopefully they’re not under a bubble and can be attacked.
- Worst targets (avoid) anything smaller than L16 and anything without an alliance. No alliance means kicked for being inactive, means no troops and not worth the stamina.
- Do not destroy a base unless you are still getting a kill count with every hit. Don’t waste stamina, if you stop getting kills (or the kill count is under 400 units) then stop attacking.
- Check for Drill Ground kills. A target might not show a kill count if they don’t have troops on the wall but you might still be getting kills. Check the BR quickly between attacks to see DG kills. Destroy these bases for max kills. Especially if they’re a VS opponent.
- Targets picked by reaction. Periodically check the Alliance attack logs especially if you see the red swords pop up then disappear. It will tell you which allies are getting attacked and this will let you quickly teleport over to them and Attack the attackers.
- Most effective use of teleports would be to be able to get kills leaving and then getting kills coming back so look for those reactionary attacks to maximize your use of teleport cooldown.
Defense kills
- If you’re in a bubble you can still get kills by looking for Attacks to pop up in the log and quickly teleporting over to send garrison. Make sure you can handle the size of the opponent otherwise you’re just feeding them kills and losing troops.
- Best way is to accompany an attacker and park near an ally that’s attacking so you can quickly send garrison if they need it, or park garrison there if you’re brave and can recall them quickly if the attacker is too big. Keep in mind, you’re not there to protect the ally base, you’re there to get kills. The idea here is the ally attackers base will be empty so if they get hit by an enemy attacker there’s no troop loss. Only defend if you can handle it.
- A great way to not attract attention of larger attackers would be to NOT teleport directly next to your ally, but park a few screens over and then use a tile to quickly travel over to the base for garrison. This way it’s more likely to attract smaller enemies that won’t suspect the garrison. If they think it’s defended then they’ll only send the really large attackers which defeats the purpose.
Rascal moves.
Keep in mind, these maneuvers are for specific VS opponents that are active and hunting you and have been trying to get you all buster day.
- The “bait” attack. If you know your enemy is slightly weaker and has troops off the wall, you can teleport next to them and Attack with squad 2. They’ll react by attacking thinking your main squad is attacking them (thus not home) and go splat. It’s exceptionally satisfying when they send all 3 or 4 squads at once and they all go splat. And even BETTER (yes this has happened) when they do it twice in a row with all Squads. Splat splat splat splat splat splat. 😅💀 And yes, keep attacking with Squad 2 to collect those drill ground kills.
- I love this one. I’ve been chased many times by squads of larger players trying to catch me landing on a tile. I cat and mouse them a while not ever landing on a tile (because they can land on the same tile too and kill me). So I keep changing directions or if it gets too fast attack a random base to slow the march. Then eventually park on a tile near their base to attack it. Their main squad is out chasing you so as soon as it lands on the tile you just left go in for the drill ground kills. Hit as many as you can until their main squad returns to defend. Then simply stop attacking so you don’t go splat.
- Using unshielded allies as bait. Park your base away from our alliance hive, use a resource tile to travel quickly to the alliance hive, and then park your troops in a sheilded base NEXT TO an unshielded base. The idea here is when that unshielded base goes under attack, you can move garrison in quickly… OR my favorite, use the squad to attack their base. Usually when attackers teleport in they think it’s safe because they see one lonely unshielded base. They aren’t suspecting nearby troops that are able to attack. The surprise hits usually get a lot of kills. Especially if it’s a VS opponent trying to take a cheap shot. For this to work, you can’t be parked nearby or it might scare them into even visiting the hive in the first place.
Videos
VIDEO #1 – First 5 minutes after Reset – Buster Prep
Things to look for in this video:
- First Arms Race for the day is Unit Progression, so train enough troops to open your chests, and then switch Arms Race to Drone Boost
- Notice the spots on the map bookmarked in Green, those were early shields. People who shield early, expire early. It marks who to hit if we see them unshielded later.
- Be sure your troops are off the wall (or just squad 1) – wasn’t shown in video, but don’t forget this step.
- Pay attention to my resources. Food and Iron are greatly misproportional over my gold coin, this means I won’t take much coin loss when I get hit. Not shown in video, but before reset (when you can get points for speedups) I speedup finished up a pending research tech and then started a new one to spend my coin down. Then I upgraded Hero Gear until I ran out of ore to spend the rest of the coin.
VIDEO #2 – 5 minutes after Reset – Buster Time!
Things to look for in this video:
- Sending multiple squads to multiple bases
- My Squad 1 became weak from troop loss so I sent it back to my base before sending it out again
- Watch for Garrisons, notice I dodged the garrison and would hit the bases that didn’t have it. When Garrison would move, I would attack the unguarded base.
- These first attacks drill ground troop deaths are high risk so know when to get out of there.
VIDEO #3 – Finding a line on the map, following it to a cluster on outer map
Things to look for in this video:
- Looking for lines on the map to indicate an active player
- Parking in the mud to prevent continuous marching (in the event of being attacked)
- Moving squads to distant resource tiles, then pulling squad 1 back. Long distance march to keep extra troops safe.
- Using Resource Tiles to travel faster
- While waiting on long marches, scan the map and Bookmark other targets
- After you hit the bookmarked target, remove the bookmark
- When you collect healed troops, get ready to move them out to a remote tile
- Looking for Drill Ground kills on Battle Reports if the screen doesn’t flash a Kill Count
VIDEO #4 – Joint attack with Gaybe on inner map cluster
Things to look for in this video:
- If you give the cluster 2 targets to focus on instead of 1, it’s often a great distraction that splits their offensive
- Targets inside the map (not in Asteroid Belt or by the perimeter of the map) often have active players that forget to shield.
- I got greedy and attacked again with Squad 1 twice despite losing too many troops. Ended up going home on fire.
- I was able to use Squad 2 (already in transit) to keep clearing out smaller bases
- I made gaybe wait 25 seconds so I could get the last few attacks in, ha!
- He got me back by teleporting in without me noticing, I was waiting and didn’t even see him on the opposite side of the cluster, ha!
- Using Resource Tiles to travel faster
- When I was getting attacked, I moved my troops to tiles to keep them out of the base while I teleported
VIDEO #5 – Showing Tile Hits in VS cluster
Things to look for in this video:
- Tile hits are a great way to get kills without using stamina
- Guaranteed kills (sometimes it’s you) but check to make sure the target isn’t too big for you to handle
- Park in the mud to prevent attackers from continuous marching
VIDEO #6 – Tile hits, dodging an aggressor trying to hit me, playing cat and mouse
Things to look for in this video:
- Park in the mud to prevent continuous marching from attackers
- This attacker noticed me hitting tiles and tried to jump in to catch my troops
- Keep moving, don’t land without watching it closely
- I didn’t want to land on his troops (or vice versa) without getting a scouting report to see what he had
VIDEO #7 – When returning back to 1813 look for an enemy target instead of teleporting to our cluster
Things to look for in this video:
- Make the best use of VS teleports by looking for a target not just going to the enemy server but also returning back to ours
- Don’t be afraid to use healing speedups, only heal the troops you need for a squad at a time. Then send the excess far away. You get VS points for healing speedups during enemy buster.
- After attacking and getting “zero” kills, I checked the Battle Report for drill ground kills. I noticed 500+ kills per hit in the BR and went back for more.
- After I hit him a few times, he probably used a Random Teleporter. But it put him right by my base, haha. Odd choice if it was on purpose, found it amusing.
VIDEO #8 – Benefits of parking in the mud during buster
Things to look for in this video:
- I was getting attacked and since I was parked in the mud, the attacker had to slowly march back to the grass before he could come back again.
- In the amount of time it took him to attack and return to attack again, I got off over 10k kills off of one of my targets.
VIDEO #9 – Kills while shielded! Baiting or intercepting a resource tile
Things to look for in this video:
- Initially teleported in thinking he was going to attack that base, so I moved a squad there to intercept the attack.
- When I realized his squad was far north, I abandoned the base trap and decided to chase him, intercepted his squad at a tile.
VIDEO #10 – Kills while shielded! Sneaking in Garrison
Things to look for in this video:
- I didn’t send Garrison to the base, I parked at a nearby tile. I figure if he hits the tile he still dies.
- He scouted the base and saw no garrison. I moved it in last second.
VIDEO #11 – The value of planning ahead. Bookmark all shields up early!
Things to look for in this video:
- Everything bookmarked in Green are VS opponents that had shields up early. I checked about an hour and 15 minutes before reset. Do not check this 1 hour before reset because you’ll get a lot of shields marked from Desert Battlefield. It has to be over an hour before reset.
- I was in “go mode” and didn’t realize he put up a shield, took me a minute to realize that’s why I couldn’t attack any more.
- This is a great example of when to use speed-up healing to replenish a handful of troops as needed.
- This attack alone got me over 3.5 million VS points.
- Notice I used an ally base parked in their cluster to move my troops to safety until I figured out my next move.
Here are some examples of my victories. 😎